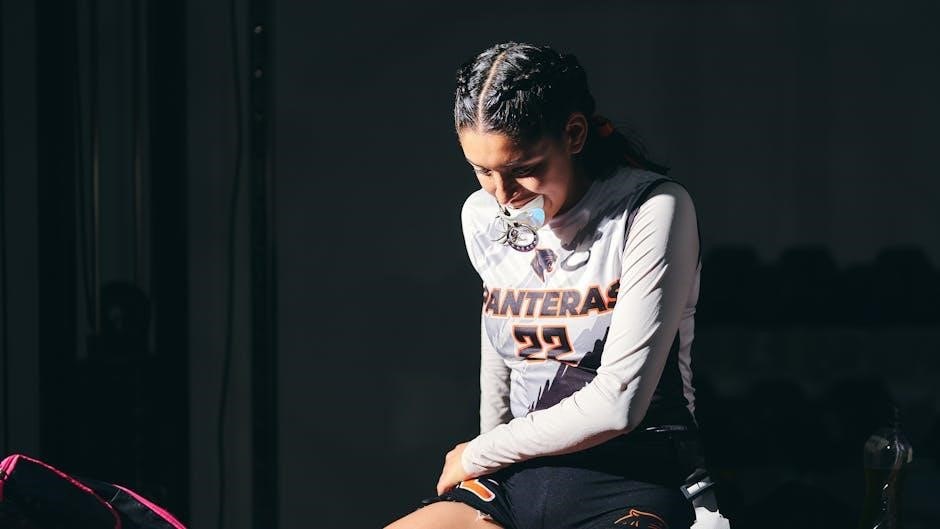
Boil and bite mouthguards offer a customizable, affordable protective solution for athletes, requiring a simple molding process with hot water for a secure fit.
These guards are widely used in various sports, providing essential protection against dental injuries, and are a convenient alternative to expensive custom-fitted options.
Proper fitting, achieved through careful boiling and molding, is crucial for optimal performance and safeguarding your teeth during physical activity.
What is a Boil and Bite Mouthguard?
Boil and bite mouthguards are thermoplastic devices designed to conform to the unique shape of your mouth, offering a personalized protective barrier. Unlike pre-made or custom-fitted guards, these require a simple heat-and-mold process using hot water.
The material softens when exposed to heat, becoming pliable enough to be molded around your teeth and gums by biting down firmly. This creates a relatively secure and comfortable fit, providing protection during contact sports or activities where dental injury is a risk.
They are a popular, cost-effective alternative, though achieving a perfect fit often requires practice and careful adherence to the manufacturer’s instructions.
Why Use a Boil and Bite Mouthguard?
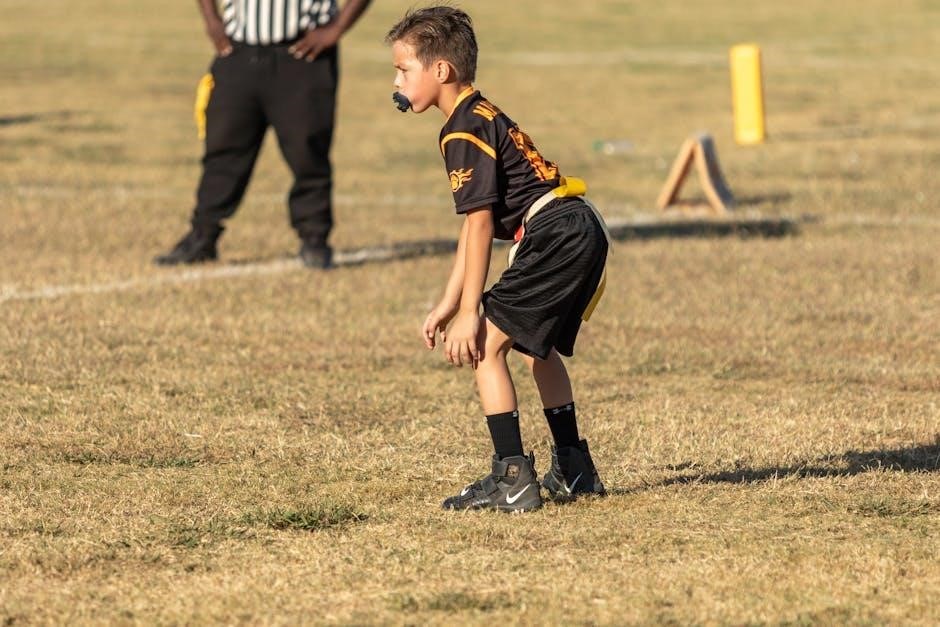
Boil and bite mouthguards are favored for their balance of affordability and protection. They significantly reduce the risk of dental injuries – chipped, fractured, or lost teeth – during sports like boxing, basketball, or football.
Compared to expensive custom-fitted options, they offer a budget-friendly solution without compromising safety. They also provide cushioning to the lips and cheeks, minimizing cuts and bruising.
The ability to customize the fit at home is a major advantage, eliminating the need for multiple dental visits. Proper use can save on costly dental work and ensure continued oral health.

Preparing to Boil Your Mouthguard
Before boiling, gather supplies like a pot, bowl, mirror, and timer. Inspect the mouthguard for any pre-existing damage, and familiarize yourself with its material composition.
Gathering Necessary Supplies
Successful mouthguard molding begins with assembling the right tools. You’ll need a medium-sized pot for boiling water, ensuring it’s clean and free of residue. A heat-resistant bowl is essential for transferring the hot water, allowing for safe submersion of the mouthguard.
A handheld mirror is crucial for visually inspecting the molding process, ensuring even coverage around your teeth. A timer, whether on your phone or a kitchen timer, is vital for precise boiling and cooling times. Finally, have access to cool, but not ice-cold, water for the initial cooling stage.
Checking the Mouthguard for Damage
Before initiating the boiling process, a thorough inspection of the mouthguard is paramount. Carefully examine the material for any pre-existing cracks, tears, or deformities. Even minor damage can compromise the guard’s protective capabilities and potentially cause injury during use.
Check for any discoloration or signs of deterioration, which might indicate the material has weakened. Ensure the mouthguard is free from any foreign objects or debris. If any damage is detected, it’s best to discard the mouthguard and obtain a new one, prioritizing your safety and dental health.
Understanding the Material Composition
Boil and bite mouthguards are typically constructed from a thermoplastic material, often a type of EVA (Ethylene-Vinyl Acetate) copolymer. This material becomes pliable when heated, allowing it to be molded to the unique contours of your teeth. The inner gel softens significantly after boiling, preparing it for a custom fit.
Understanding this composition is key to successful molding. The material’s responsiveness to heat enables personalization, but it also means exceeding recommended boiling times can cause irreversible deformation. Knowing the material allows for a safe and effective fitting process.
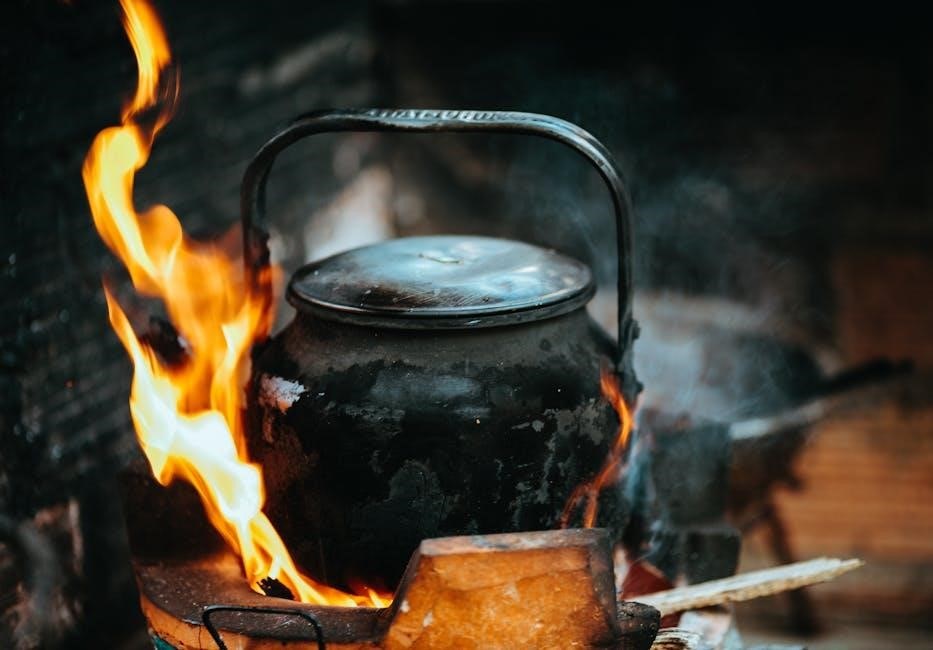
The Boiling Process
Boiling is essential to soften the thermoplastic material, making it moldable. Carefully submerge the mouthguard in vigorously boiling water for the recommended duration.
This heat activation prepares the guard for a personalized fit, ensuring optimal protection during athletic activities.
Heating the Water
Begin by bringing a pot of water to a rolling boil, ensuring sufficient depth to fully submerge the mouthguard. A dedicated pot solely for this purpose is recommended to avoid contamination.
Carefully pour the boiling water into a heat-resistant bowl, providing a stable and safe vessel for the molding process. Avoid using fragile containers that could shatter from the extreme temperature.
The water must remain at a consistent boil throughout the submersion period to effectively soften the mouthguard’s material. Maintaining this temperature is critical for achieving a proper mold.
Always exercise caution when handling boiling water to prevent accidental burns or scalding injuries. Prioritize safety throughout the entire heating process.
Optimal Water Temperature
Maintaining the correct water temperature is paramount for successful mouthguard molding. The water should be at a vigorous, rolling boil – approximately 212°F (100°C) – to adequately soften the thermoplastic material.
Insufficient heat will result in a rigid mouthguard that doesn’t conform to your teeth, while excessively hot water could potentially damage or distort the guard’s shape.
Consistent monitoring of the water temperature is crucial throughout the process; re-boil if the temperature drops significantly. A thermometer can be used for precise measurement, though visual cues are often sufficient.
Remember, the goal is to make the mouthguard pliable, not melted, ensuring a safe and effective molding experience.
Submerging the Mouthguard
Carefully submerge the mouthguard completely into the boiling water, ensuring all surfaces are exposed to the heat. Utilize a slotted spoon or tongs to gently lower the guard, avoiding direct contact with the pot’s bottom.
Full submersion guarantees even softening of the thermoplastic material, crucial for a consistent and comfortable fit. Avoid overcrowding the pot; ensure the mouthguard has ample space to move freely within the water.
Monitor the mouthguard closely during submersion, observing its gradual softening. Consistent contact with the boiling water is essential for achieving the desired pliability.
This step prepares the mouthguard for the molding process, setting the stage for a personalized and protective fit.
Recommended Boiling Time (25-35 seconds)
Maintain the mouthguard in boiling water for 25 to 35 seconds, a critical timeframe for optimal softening. Exceeding this duration can lead to over-softening, resulting in a distorted or ill-fitting guard.
Conversely, insufficient boiling time may leave the material too rigid for effective molding. Precise timing is paramount for achieving the necessary plasticity without compromising the mouthguard’s integrity.
Use a timer to ensure accuracy, and observe the mouthguard’s texture; it should become pliable yet retain some structure.
This controlled heating process is fundamental to a successful boil and bite experience.
Molding the Mouthguard
Remove the softened mouthguard, cool briefly, insert into your mouth, and bite down firmly, using fingers to mold it precisely around all teeth and gums.
Removing from Hot Water
Carefully extract the mouthguard from the boiling water using a utensil – avoid using your fingers to prevent burns. Once removed, a brief waiting period is essential before insertion. This allows the material to cool slightly, making it manageable and preventing scalding of your mouth.
The mouthguard will be very soft and pliable at this stage, so handle it with care. Ensure there’s no remaining boiling water clinging to the surface before proceeding to the next step. A quick visual check is recommended for safety and optimal molding.
Cooling Period Before Insertion
Allowing a short cooling phase is vital before attempting to mold the mouthguard in your mouth. Waiting a few seconds – typically 5-10 – prevents burns and ensures a more comfortable experience. The material needs to become slightly less pliable, but still soft enough to conform to your teeth effectively.
This brief pause also allows you to position yourself comfortably in front of a mirror, preparing for accurate insertion and biting. Rushing this step can lead to an uneven mold or, worse, a painful burn. Patience is key for a successful fit!
Inserting into the Mouth
Carefully position the softened mouthguard over your upper teeth, ensuring it covers all teeth intended for protection. A mirror is incredibly helpful during this step to guarantee proper alignment. Gently press the guard onto your teeth, and close your mouth naturally, avoiding any excessive force initially.
The mouthguard should sit comfortably without causing immediate discomfort. It’s crucial to center the guard, ensuring even coverage. Avoid shifting or sliding it around excessively before biting down, as this can distort the molding process. Prepare for the next step – firm biting!
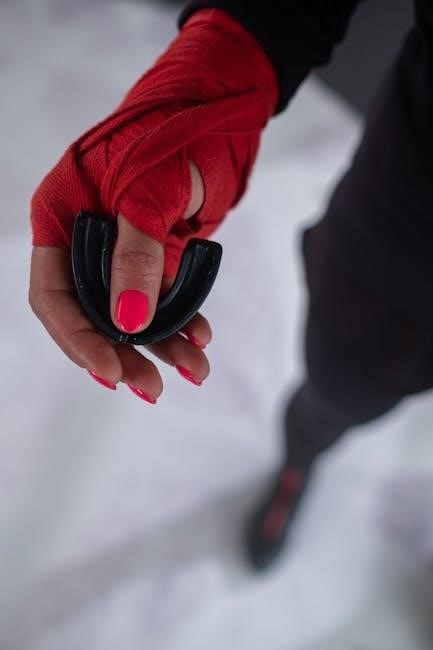
Biting Down Firmly
Once the mouthguard is positioned, bite down with consistent, firm pressure. Don’t be shy – you want to mold the material around every contour of your teeth! Some users describe biting “just shy of feeling like you’re going to bite through it,” indicating sufficient force. Maintain this pressure for the duration recommended by the manufacturer, typically around 20-30 seconds.
This firm bite is essential for creating a precise impression. Avoid biting unevenly; distribute the pressure across all teeth. If the mouthguard feels like it’s slipping, gently use your fingers to guide it into place while maintaining the bite.
Using Fingers to Mold Around Teeth
While biting down firmly, use your thumbs and fingers to gently press the mouthguard against the outer surfaces of your teeth and gums. This external pressure helps ensure the material conforms perfectly to your unique dental structure. Pay close attention to the molars, pressing the guard down and outwards to capture their shape.
Simultaneously, use your fingers to smooth any excess material that may be bubbling up or folding over. This step is crucial for comfort and preventing interference with your bite. Continue molding for the recommended time, maintaining both the bite and finger pressure.

The Cooling and Setting Process
Cooling is vital for setting the mouthguard’s shape; initial cooling uses cool water, while some advocate a brief ice water dip for firmness.
A final bite check confirms a secure, comfortable fit after the material has hardened, ensuring optimal protection during use.
Initial Cooling with Cool Water (Not Ice)
After removing the mouthguard from the hot water, immediate cooling with cool – not ice-cold – water is a crucial step in the molding process. This initial cooling helps to stabilize the softened material, preventing it from becoming too rigid before insertion into the mouth.
Running the mouthguard under a gentle stream of cool tap water for approximately 10-20 seconds is generally recommended. This controlled cooling allows for a more manageable transition, ensuring the material remains pliable enough to conform to your teeth and gums effectively.
Avoid using ice water at this stage, as the sudden temperature change can cause the mouthguard to harden prematurely, hindering its ability to mold properly and potentially leading to an uncomfortable or ill-fitting result.
Ice Water Dip – Considerations & Debate
The practice of dipping a boil-and-bite mouthguard in ice water after the initial cool water rinse is a point of contention among users. Some advocate for it, believing the rapid cooling “sets” the mold more effectively, creating a tighter, more permanent fit.
However, others caution against it, suggesting the shock of ice water can cause the material to contract and distort, leading to an inaccurate fit or even making the mouthguard brittle.
Many instructions don’t explicitly call for an ice water dip, recommending only cool water. Experimentation and careful observation of the mouthguard’s responsiveness are key to determining what works best for you.
Final Bite Check for Fit
After the cooling and setting process, a thorough bite check is paramount. Insert the mouthguard and bite down firmly, assessing the fit against your upper teeth. It should feel snug and secure, without excessive bulkiness or movement.
Check for even contact across all teeth; gaps indicate insufficient molding. If it easily peels off, you likely didn’t bite down hard enough during the molding phase, requiring a re-boil.
Ensure you can comfortably close your mouth and breathe without obstruction. A properly fitted mouthguard is crucial for effective protection and comfortable use during activity.

Troubleshooting Common Issues
Common problems include poor fit, bulkiness, or discomfort. Re-boiling can often correct fit issues, while trimming may address bulkiness, ensuring a comfortable experience.
Mouthguard Doesn’t Fit After First Attempt
If the mouthguard doesn’t fit correctly after the initial molding, don’t despair! It’s a common occurrence, and often easily remedied. The key is usually re-boiling and repeating the molding process. Ensure you’re biting down firmly – almost to the point of discomfort – to capture a good impression.
Insufficient bite pressure is a frequent cause of poor fit. Remember, if you can easily peel the mouthguard off your teeth after molding, you didn’t bite hard enough. Also, double-check you’re following the recommended boiling and cooling times precisely. A second attempt, with increased bite force, often yields a significantly improved fit.
Mouthguard is Too Bulky
A bulky mouthguard can hinder breathing and speech, impacting performance. If your molded mouthguard feels excessively thick, it likely means too much material was used during the molding process. When re-boiling, focus on distributing the material more evenly across your teeth.
Use your fingers to actively thin out the material in areas where it feels particularly thick, especially around the sides and back teeth. Some brands, like Venum, incorporate a gap for front teeth, aiding a tighter, less bulky fit. Ensure adequate cooling after each molding attempt to set the shape effectively.
Mouthguard Feels Uncomfortable
An uncomfortable mouthguard often indicates an improper fit, causing irritation or pressure points. If discomfort persists, re-boiling for adjustments is necessary. Ensure you’re biting down firmly – almost to the point of feeling a slight bite through – to capture an accurate impression of your teeth.
Pay close attention to molding around the back teeth, as this area significantly impacts stability and comfort. If specific areas rub, gently re-mold those sections while the material is pliable. Remember, multiple attempts may be needed to achieve a truly comfortable and secure fit.
Care and Maintenance
Regular cleaning with cool water and mild soap extends your mouthguard’s lifespan, preventing bacteria buildup. Store it in a ventilated case, away from heat and direct sunlight.
Cleaning Your Mouthguard
Consistent cleaning is paramount for maintaining hygiene and extending the life of your boil and bite mouthguard. After each use, thoroughly rinse the mouthguard under cool running water to remove saliva and debris. Employ a mild, non-abrasive soap or a specialized mouthguard cleaner; avoid harsh chemicals or alcohol-based solutions, as these can degrade the material.
Use a soft-bristled toothbrush to gently scrub all surfaces, paying close attention to crevices where bacteria can accumulate. Ensure all soap residue is completely rinsed away before storing. Proper cleaning prevents unpleasant odors and minimizes the risk of bacterial growth, contributing to better oral health.
Storage Recommendations
Proper storage safeguards your boil and bite mouthguard from damage and contamination when not in use. Always store the mouthguard in a well-ventilated, protective case – the case provided with the mouthguard is ideal. Avoid leaving it exposed to direct sunlight or extreme temperatures, as this can warp the shape and compromise the fit.
Keep the case clean and dry to prevent bacterial growth. Do not store the mouthguard with other dental appliances. Regularly inspect the case for cracks or damage and replace it if necessary. Following these guidelines ensures your mouthguard remains hygienic and ready for use.
Lifespan of a Boil and Bite Mouthguard
The lifespan of a boil and bite mouthguard varies depending on usage and care, but generally ranges from several months to a year. Frequent, intense use will naturally shorten its lifespan. Regularly inspect the mouthguard for signs of wear and tear, such as cracks, tears, or distortion of the shape.
If any damage is detected, replace the mouthguard immediately to ensure continued protection. Even without visible damage, consider replacing it annually, or more often if you are a high-impact athlete. Proper cleaning and storage extend its usability.
Specific Brand Considerations (Venum Example)
Venum mouthguards often feature a gap designed for front teeth, enhancing the fit and comfort, especially for younger athletes, requiring a firm bite during molding.
Venum Mouthguard Fitting Tips
Achieving a secure fit with a Venum mouthguard requires diligent adherence to the instructions; biting down “just shy of feeling like you’re going to bite through it” is key.
Ensure a complete impression by applying firm, even pressure across all teeth. Don’t hesitate to use your fingers to mold the softened material around each tooth for a precise contour.
If the mouthguard easily peels off after molding, it indicates insufficient bite force – re-boil and repeat the process with increased pressure. Following the boil, a cool water rinse (not ice water) is generally recommended before the final bite check.
Unique Design Features (e.g., gap for front teeth)
Venum mouthguards often incorporate a distinctive gap designed specifically for accommodating children’s or adult’s front teeth, promoting a tighter and more secure overall fit.
This intentional space allows for better adaptation to the natural contours of the mouth, minimizing slippage during intense activity. After a 40-second boil, the inner gel becomes exceptionally pliable, ready for precise molding.
This feature enhances comfort and protection, ensuring the mouthguard remains firmly in place, safeguarding teeth from impact. The gap contributes to a more customized and effective protective experience.
Safety Precautions
Exercise extreme caution when handling boiling water to prevent scalding injuries; always supervise children throughout the entire mouthguard fitting process for safety.
Avoiding Scalding
Boiling water presents a significant burn risk, demanding utmost care during the mouthguard preparation process. Always use a heat-resistant container and carefully pour the hot water, avoiding splashes or spills. Utilize long-handled utensils, like tongs or a slotted spoon, to safely submerge and retrieve the mouthguard from the boiling water, keeping your hands at a safe distance.
Ensure a stable work surface, free from obstructions, to prevent accidental tipping of the hot water. If children are present, maintain a safe distance and constant supervision. In the unfortunate event of a scald, immediately cool the affected area with cool (not ice-cold) running water for at least ten minutes and seek medical attention if necessary.
Supervising Children
The boiling water process is inherently dangerous for children and should always be performed by a responsible adult. Never allow a child to handle boiling water or attempt to mold the mouthguard independently. Constant, direct supervision is crucial throughout the entire process, from heating the water to cooling and fitting the mouthguard.
Ensure the child understands the risks involved and refrains from touching the hot water or mouthguard until it has cooled sufficiently. Explain the importance of following instructions carefully and remaining still during the molding process. Prioritize safety above all else, and consider professional fitting as a safer alternative for younger children.

Advanced Molding Techniques
Re-boiling allows for adjustments if the initial fit isn’t perfect, while professional fitting offers a superior, customized solution for optimal comfort and protection.
Re-Boiling for Adjustments
If the initial fit isn’t satisfactory, don’t discard the mouthguard! Re-boiling is a viable option for refining the mold and achieving a more comfortable, secure fit. Repeat the boiling process – approximately 25-35 seconds – and quickly remold it in your mouth, focusing on areas needing adjustment.
Remember to cool it properly afterward. Multiple attempts might be necessary, but avoid excessive re-boiling, as it can degrade the material. Be mindful of the material’s limits; repeated heating can compromise its integrity. If adjustments prove difficult, consider professional assistance.
Professional Fitting Alternatives
While boil and bite mouthguards are convenient, professional fitting offers superior comfort and protection. Dentists can create custom-fitted mouthguards using impressions of your teeth, ensuring a precise and secure fit tailored to your unique dental structure.
These custom guards generally provide better impact absorption and are less bulky than boil-and-bite options. Although more expensive, the investment can be worthwhile for athletes in high-impact sports or those with specific dental concerns. A professional fitting eliminates the trial-and-error of the boil-and-bite method, guaranteeing optimal protection.